How to make a simple corona motor
I wanted to make a corona motor that could be made by anyone using parts from around the house. This page shows the result of that. As you can see from the video below, it works very well.
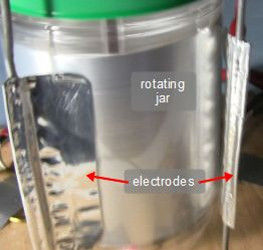
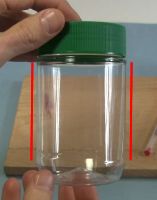
Below you can see the corona in the gaps between the rotating jar and the electrodes, the blade-like parts facing the jar. It's here that the forces of repulsion at one gap and attraction at the next gap cause the rotation of the jar.

How to make the corona motor
Here are the step-by-step instructions for making this corona motor, showing the rotating parts first and then the stationary parts.
The rotating section
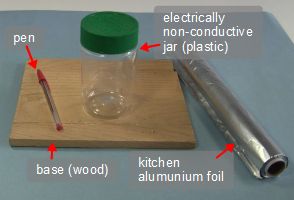
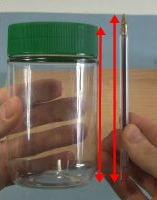
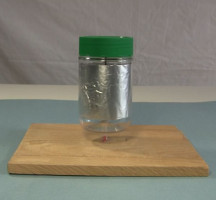
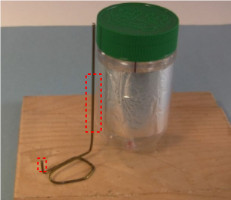
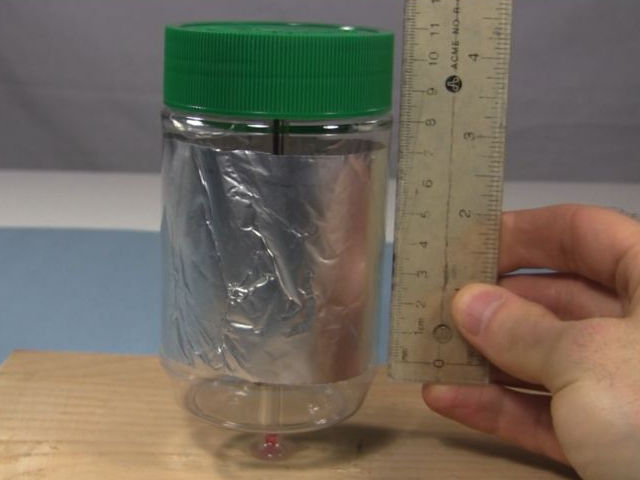
For the parts for the rotating section get a jar made of non-electrically conductive material, plastic in this case, and that has straight lengths along its sides. Also get a pen that is longer than the jar is tall, a non-electrically conductive base to put it all on, and some aluminum foil from the kitchen.
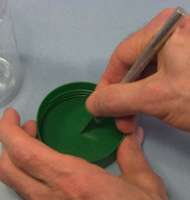
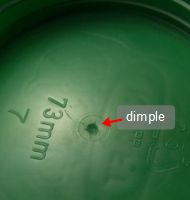
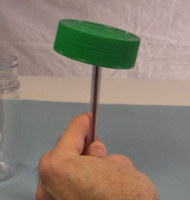
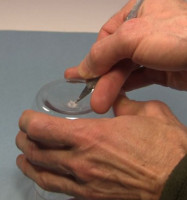
Find the center of the inside of the lid for the jar and make a dimple. As shown below, you should be able to put the tip of the pen in this dimple and balance the jar on it somewhat. Usually there's already some manufacturer's mark inside at the center. I'm using an x-acto knife to do this.
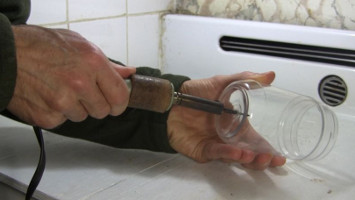
Make a hole in the bottom center of the jar for the pen to go through. Ideally the pen should not touch the sides of the hole when the whole thing is balancing on the pen. Usually there's some indication on the bottom of the jar as to where the center is. Use whatever tool you have for doing this. I used an x-acto knife and a soldering iron but drilling the hole will also work.
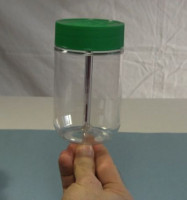
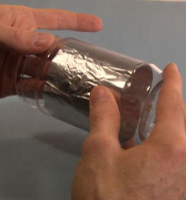
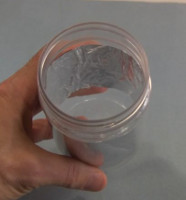
It helps a lot if you line the inside of the jar with aluminum foil, as is shown below.

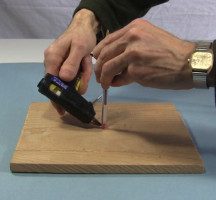
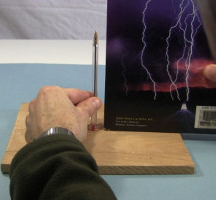
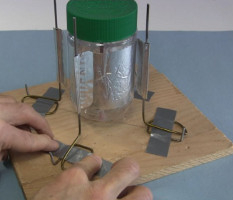
And lastly for the rotation section, hot glue the pen to the base. Use a generous amount of hot glue. To get the pen straight up with respect to the base, on trick is to check it by standing a book on the base beside the pen. Below you can see the finished rotating section for the corona motor.
The stationary section - the electrodes
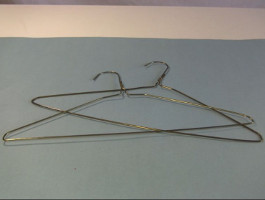
The electrodes are held in place by supports made of clothes hanger wire but the clothes hanger wire also serves to conduct electricty to the electrodes.
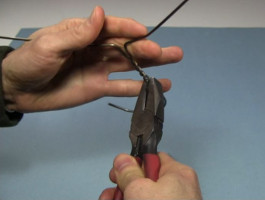
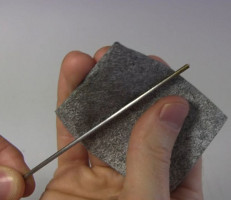
Below you can see I'm using a pair of pliers to open, shape and cut the clothes hanger wire. It's also necessary to sand off any coating on the hanger where the electrodes will be contact it and where you'll be attaching a wire to it later (see the rightmost photo below for where to sand.)
For the electrodes you need something that has a sharp, thin edge and can hold its shape i.e. doesn't flex too easily. For example, my first version of this motor used kitchen aluminum foil for the electrodes but since it was flexible it would be attracted to the jar and touch it, creating a drag on the jar. The motor turned at around half the speed of this one where the electrodes don't flex and so they don't touch the jar.
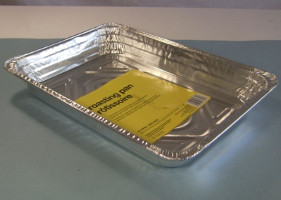
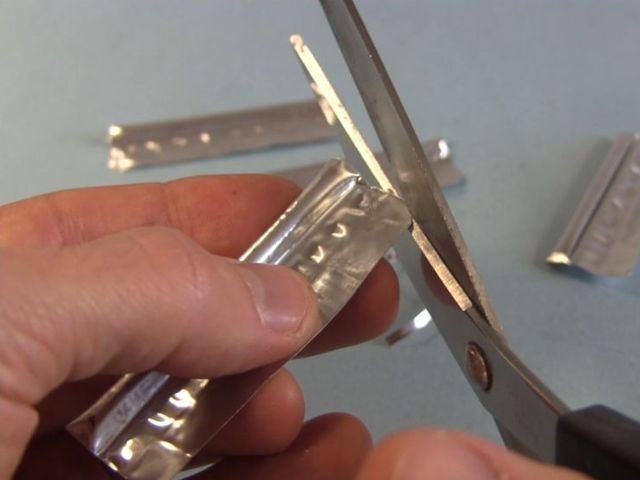
An easy, workable source for material that fits that criteria is the metal on disposable aluminum roasting pans. The metal near the top edge of the pan, as shown below, is ideal because the very edge is a sturdy hollow tube. This material isn't 100% ideal, since it is a little difficult to make a perfectly flat electrode with it, but since this is intended to be an easy to make motor, it does the job.
Be sure to cut the corners of the edge round, as shown in the rightmost photo below. This is to prevent too strong of an electric field at the ends, allowing a more spread out corona along the entire edge.
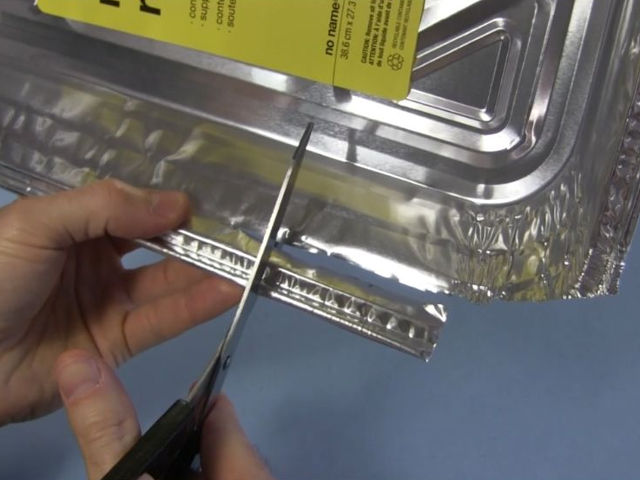
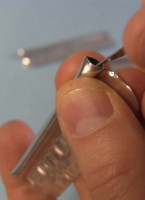
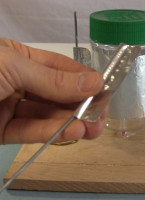
As said above, the edge of the roasting pan is a hollow tube. As shown below, this can be opened up and then slid onto the clothes hanger wire. By then squeezing the tube it will hold in place on the wire while still being loose enough to be adjusted along the wire.
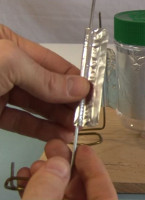
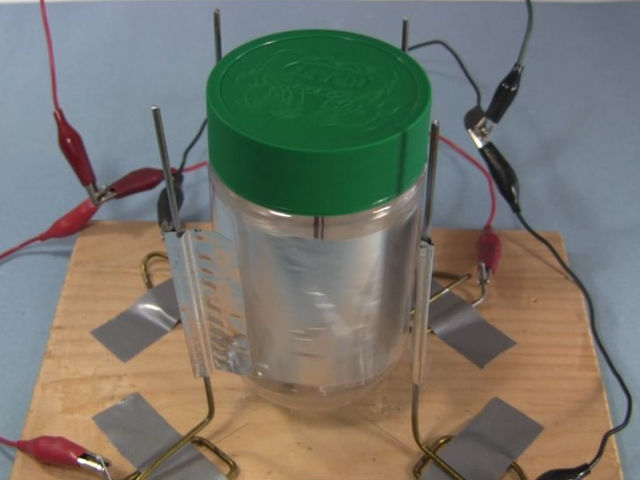
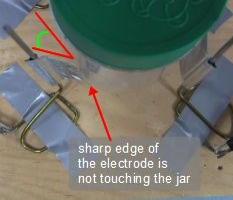
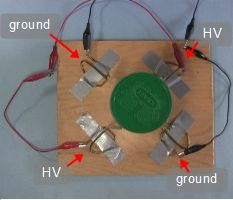
Now that the electrodes are attached to the hanger wires, tape the combination in place on the base. I made four identical ones and so spaced them out evenly around the jar. As shown in the middle photo below, the electrodes face the side of the jar at an angle and with the sharp edge not touching. It's arranging them at an angle like this that makes the corona motor able to start without having to give it an intial push.
The wiring is shown in the rightmost photo below. I simply connect wires with alligator clips on them to the parts of the hanger wire I'd sanded off (as shown above) for making contact with. They are wired in an alternating fashion. One is for connecting to high voltage, then the next is for connecting to ground and then high voltage and then ground.
Final connection to power sources is made to any metal place along the wiring.
Running the corona motor
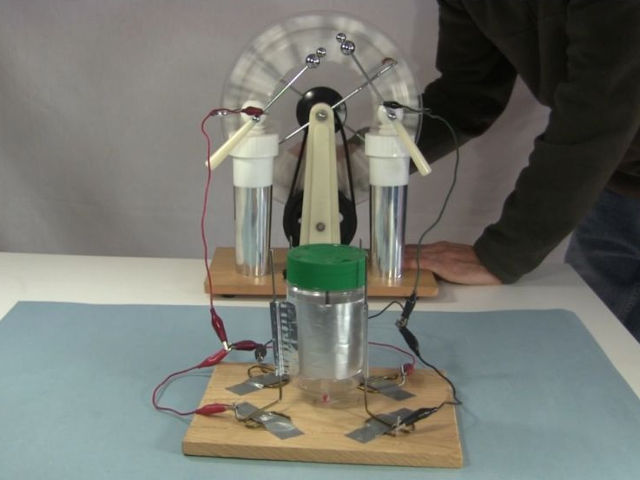
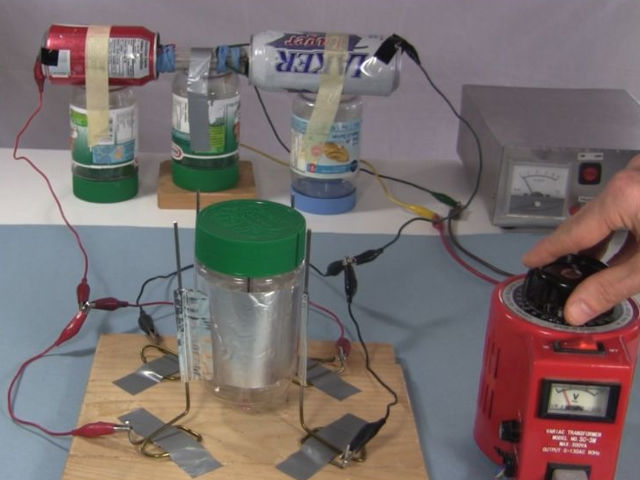
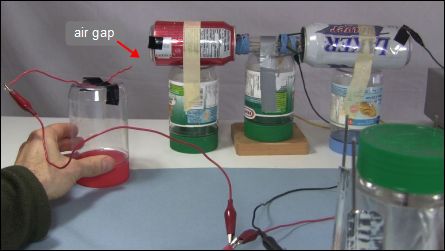
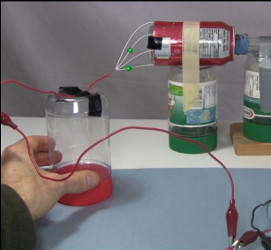
Below you can see the corona motor being powered by a Wimshurst machine and my homemade Van de Graaff generator.
Below I'm powering it more as an atmospheric motor since I'm using ions from the air. Notice in the photo on the left that the high voltage connection actually goes to a wire that ends in a single sharp strand of wire. Then there's a gap before the high voltage can of the Van de Graaff generator. As the photo on the right illustrates, there's an electric field between the end of the sharp wire and the smooth can. If the gap is small enough then the air between them becomes sufficiently ionized for electricity to conduct across the gap and power the corona motor. The other end of the corona motor is connect to the grounded side of the Van de Graff generator.
Video - How to Make a Corona Motor or Electrostatic motor/Atmospheric motor
Here's a video I made that goes step-by-step through making the corona motor followed by demonstrations of it in use.
